下载 Elasticsearch
# 下载 Elasticsearch
1. Elasticsearch 官网下载链接
https://www.elastic.co/cn/downloads/elasticsearch (opens new window)
安装 Elasticsearch(ES)需要以下步骤:
- 安装 Java
Elasticsearch 是基于 Java 运行的,所以需要先安装 Java。最好使用 Oracle JDK 或 OpenJDK 8 版本。
可以使用以下命令来安装 OpenJDK:
sudo yum install java-1.8.0-openjdk
- 安装 Elasticsearch
将下载的 Elasticsearch 压缩包解压到指定目录下,例如 /usr/local 目录下:
sudo tar -xzf elasticsearch-7.16.2-linux-x86_64.tar.gz -C /usr/local/
- 启动 Elasticsearch
进入 Elasticsearch 目录下的 bin 目录,执行以下命令启动 Elasticsearch:
sudo ./elasticsearch
在后台运行:
sudo nohup ./elasticsearch &
- 验证 Elasticsearch 是否启动成功
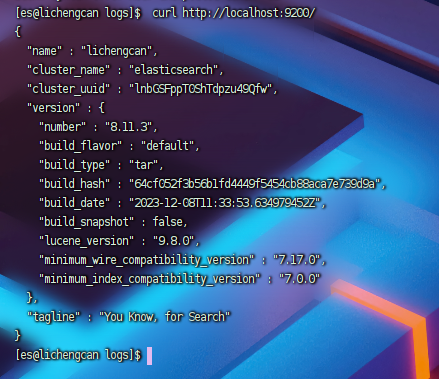
使用 curl 命令验证 Elasticsearch 是否启动成功:
curl http://localhost:9200/
如果返回类似以下内容,则表示 Elasticsearch 已经成功安装并启动:
{
  "name" : "Your-Hostname",
  "cluster_name" : "elasticsearch",
  "cluster_uuid" : "xxxxxxxxxxxxxxxxxxxx",
  "version" : {
    "number" : "7.16.2",
    "build_flavor" : "default",
    "build_type" : "tar",
    "build_hash" : "d47ad2a",
    "build_date" : "2022-01-19T22:14:02.141971330Z",
    "build_snapshot" : false,
    "lucene_version" : "8.10.2",
    "minimum_wire_compatibility_version" : "6.8.0",
    "minimum_index_compatibility_version" : "6.0.0-beta1"
  },
  "tagline" : "You Know, for Search"
}
以上就是在 CentOS 7 中安装 Elasticsearch 的步骤。
# 启动报错1
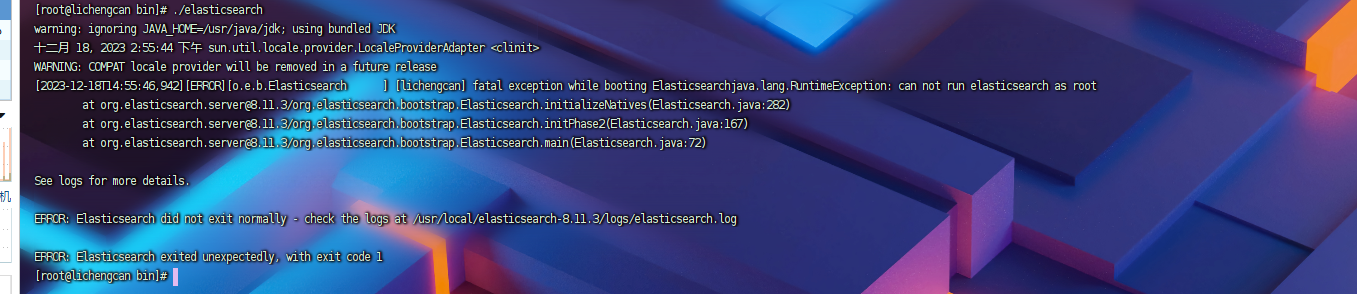
根据你提供的信息,Elasticsearch 无法以 root 用户身份运行。建议你使用非 root 用户运行 Elasticsearch。
可以创建一个新的用户并分配合适的权限,然后使用该用户运行 Elasticsearch。请按照以下步骤操作:
- 创建新用户
sudo useradd es
- 设置新用户密码
sudo passwd es
- 将 Elasticsearch 安装目录的所有者更改为新用户
sudo chown -R es:es /usr/local/elasticsearch-8.11.3/
- 切换到新用户
su - es
- 启动 Elasticsearch
在 Elasticsearch 目录下的 bin 目录中,执行以下命令:
./elasticsearch
现在 Elasticsearch 应该已经成功启动了。
还有坑
1.需要给es用户加上sudo权限:
sudo usermod -aG sudo es
2.sudo visudo
root ALL=(ALL:ALL) ALL
# 启动报错2
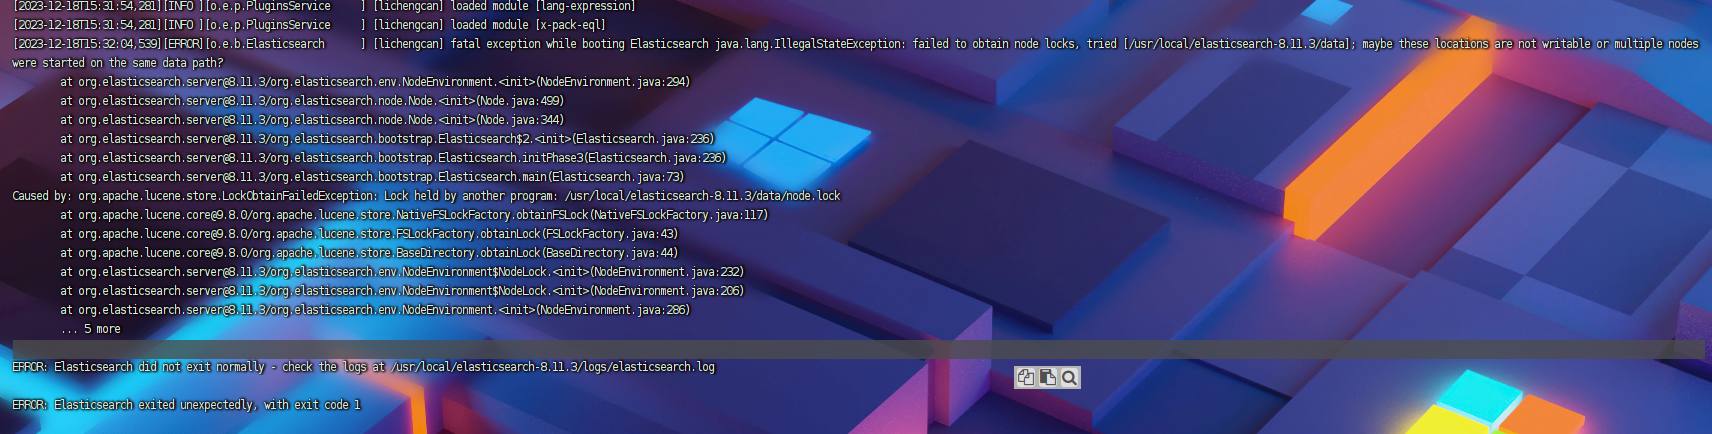
- 确保elasticsearch目录下的data目录可写。你可以使用以下命令更改目录权限:
sudo chmod 777 /usr/local/elasticsearch-8.11.3/data
试过了,不行
- 检查是否有其他用户或进程占用了Elasticsearch的节点锁。你可以使用以下命令查看哪些进程正在使用node.lock文件:
sudo lsof | grep node.lock
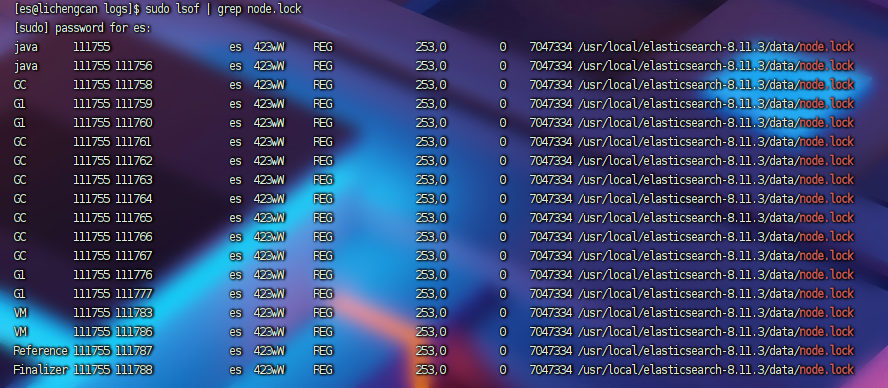
把这些进程杀死了还是不行
- 修改配置文件
要查看Elasticsearch的访问端口,您可以检查Elasticsearch配置文件中的elasticsearch.yml文件。默认情况下,Elasticsearch使用9200端口作为HTTP RESTful API的默认端口,而9200端口用于节点之间的通信。
您可以使用以下命令查看elasticsearch.yml文件的内容:
cat /usr/local/elasticsearch-8.11.3/config/elasticsearch.yml
查找以下行,其中包含有关HTTP或节点通信端口的信息:
http.port: 9200
transport.tcp.port: 9300
上述示例中,http.port指定了HTTP端口(默认为9200),而transport.tcp.port指定了节点之间的通信端口(默认为9300)。
要测试Elasticsearch是否成功启动,可以使用curl命令或任何HTTP客户端来发送请求并检查响应。例如,使用curl测试:
curl -X GET "http://localhost:9200/"
测试还是报错
$ curl -X GET "http://localhost:9200/"
curl: (52) Empty reply from server
出现 "Empty reply from server" 的错误可能有几个原因。以下是一些可能的解决方法:
等待一段时间: 有时,Elasticsearch启动可能需要一些时间。等待一分钟然后重新尝试。
检查Elasticsearch日志: 检查Elasticsearch的日志文件,通常位于
/usr/local/elasticsearch-8.11.3/logs/目录中。查看日志文件可以提供关于启动过程中出现的任何问题的更多信息。cat /usr/local/elasticsearch-8.11.3/logs/elasticsearch.log这个是日志信息:[2023-12-18T15:50:19,033][WARN ][o.e.h.n.Netty4HttpServerTransport] [lichengcan] received plaintext http traffic on an https channel, closing connection Netty4HttpChannel{localAddress=/192.168.104.128:9200, remoteAddress=/192.168.104.1:8741} [2023-12-18T15:50:19,037][WARN ][o.e.h.n.Netty4HttpServerTransport] [lichengcan] received plaintext http traffic on an https channel, closing connection Netty4HttpChannel{localAddress=/192.168.104.128:9200, remoteAddress=/192.168.104.1:8743}根据日志信息,您遇到的问题是Elasticsearch正在收到明文的HTTP流量,而通道却是通过HTTPS配置的。这可能是由于Elasticsearch配置中的HTTPS设置导致的。在默认情况下,Elasticsearch使用HTTPS进行安全通信,但如果您使用了HTTP而不是HTTPS,则可能会收到这些警告。
为了解决这个问题,您可以采取以下步骤:
检查
elasticsearch.yml配置文件: 打开Elasticsearch的配置文件(通常在/usr/local/elasticsearch-8.11.3/config/elasticsearch.yml),并确保以下HTTPS设置已正确配置:xpack.security.enabled: false或者,如果您使用较早版本的Elasticsearch,您可能需要找到和禁用以下配置:
searchguard.ssl.http.enabled: false请注意,上述设置是禁用Elasticsearch的安全特性。在生产环境中,如果需要安全性,请谨慎进行配置。
重新启动Elasticsearch: 在更改配置后,重新启动Elasticsearch以使更改生效:
sudo service elasticsearch restart再次尝试使用curl: 确保您的curl命令使用HTTP协议:
curl -X GET "http://localhost:9200/"测试成功
# 重启es脚本
#!/bin/bash

# 查找并杀死Elasticsearch进程
pids=$(ps -ef | grep elasticsearch | awk '{print $2}')

for pid in $pids; do
  echo "Killing Elasticsearch process with PID $pid"
  kill -9 $pid
done

# 确保所有进程都已终止
sleep 2

# 启动Elasticsearch服务
echo "Starting Elasticsearch in the background..."
nohup /usr/local/elasticsearch-8.11.3/bin/elasticsearch > /dev/null 2>&1 &
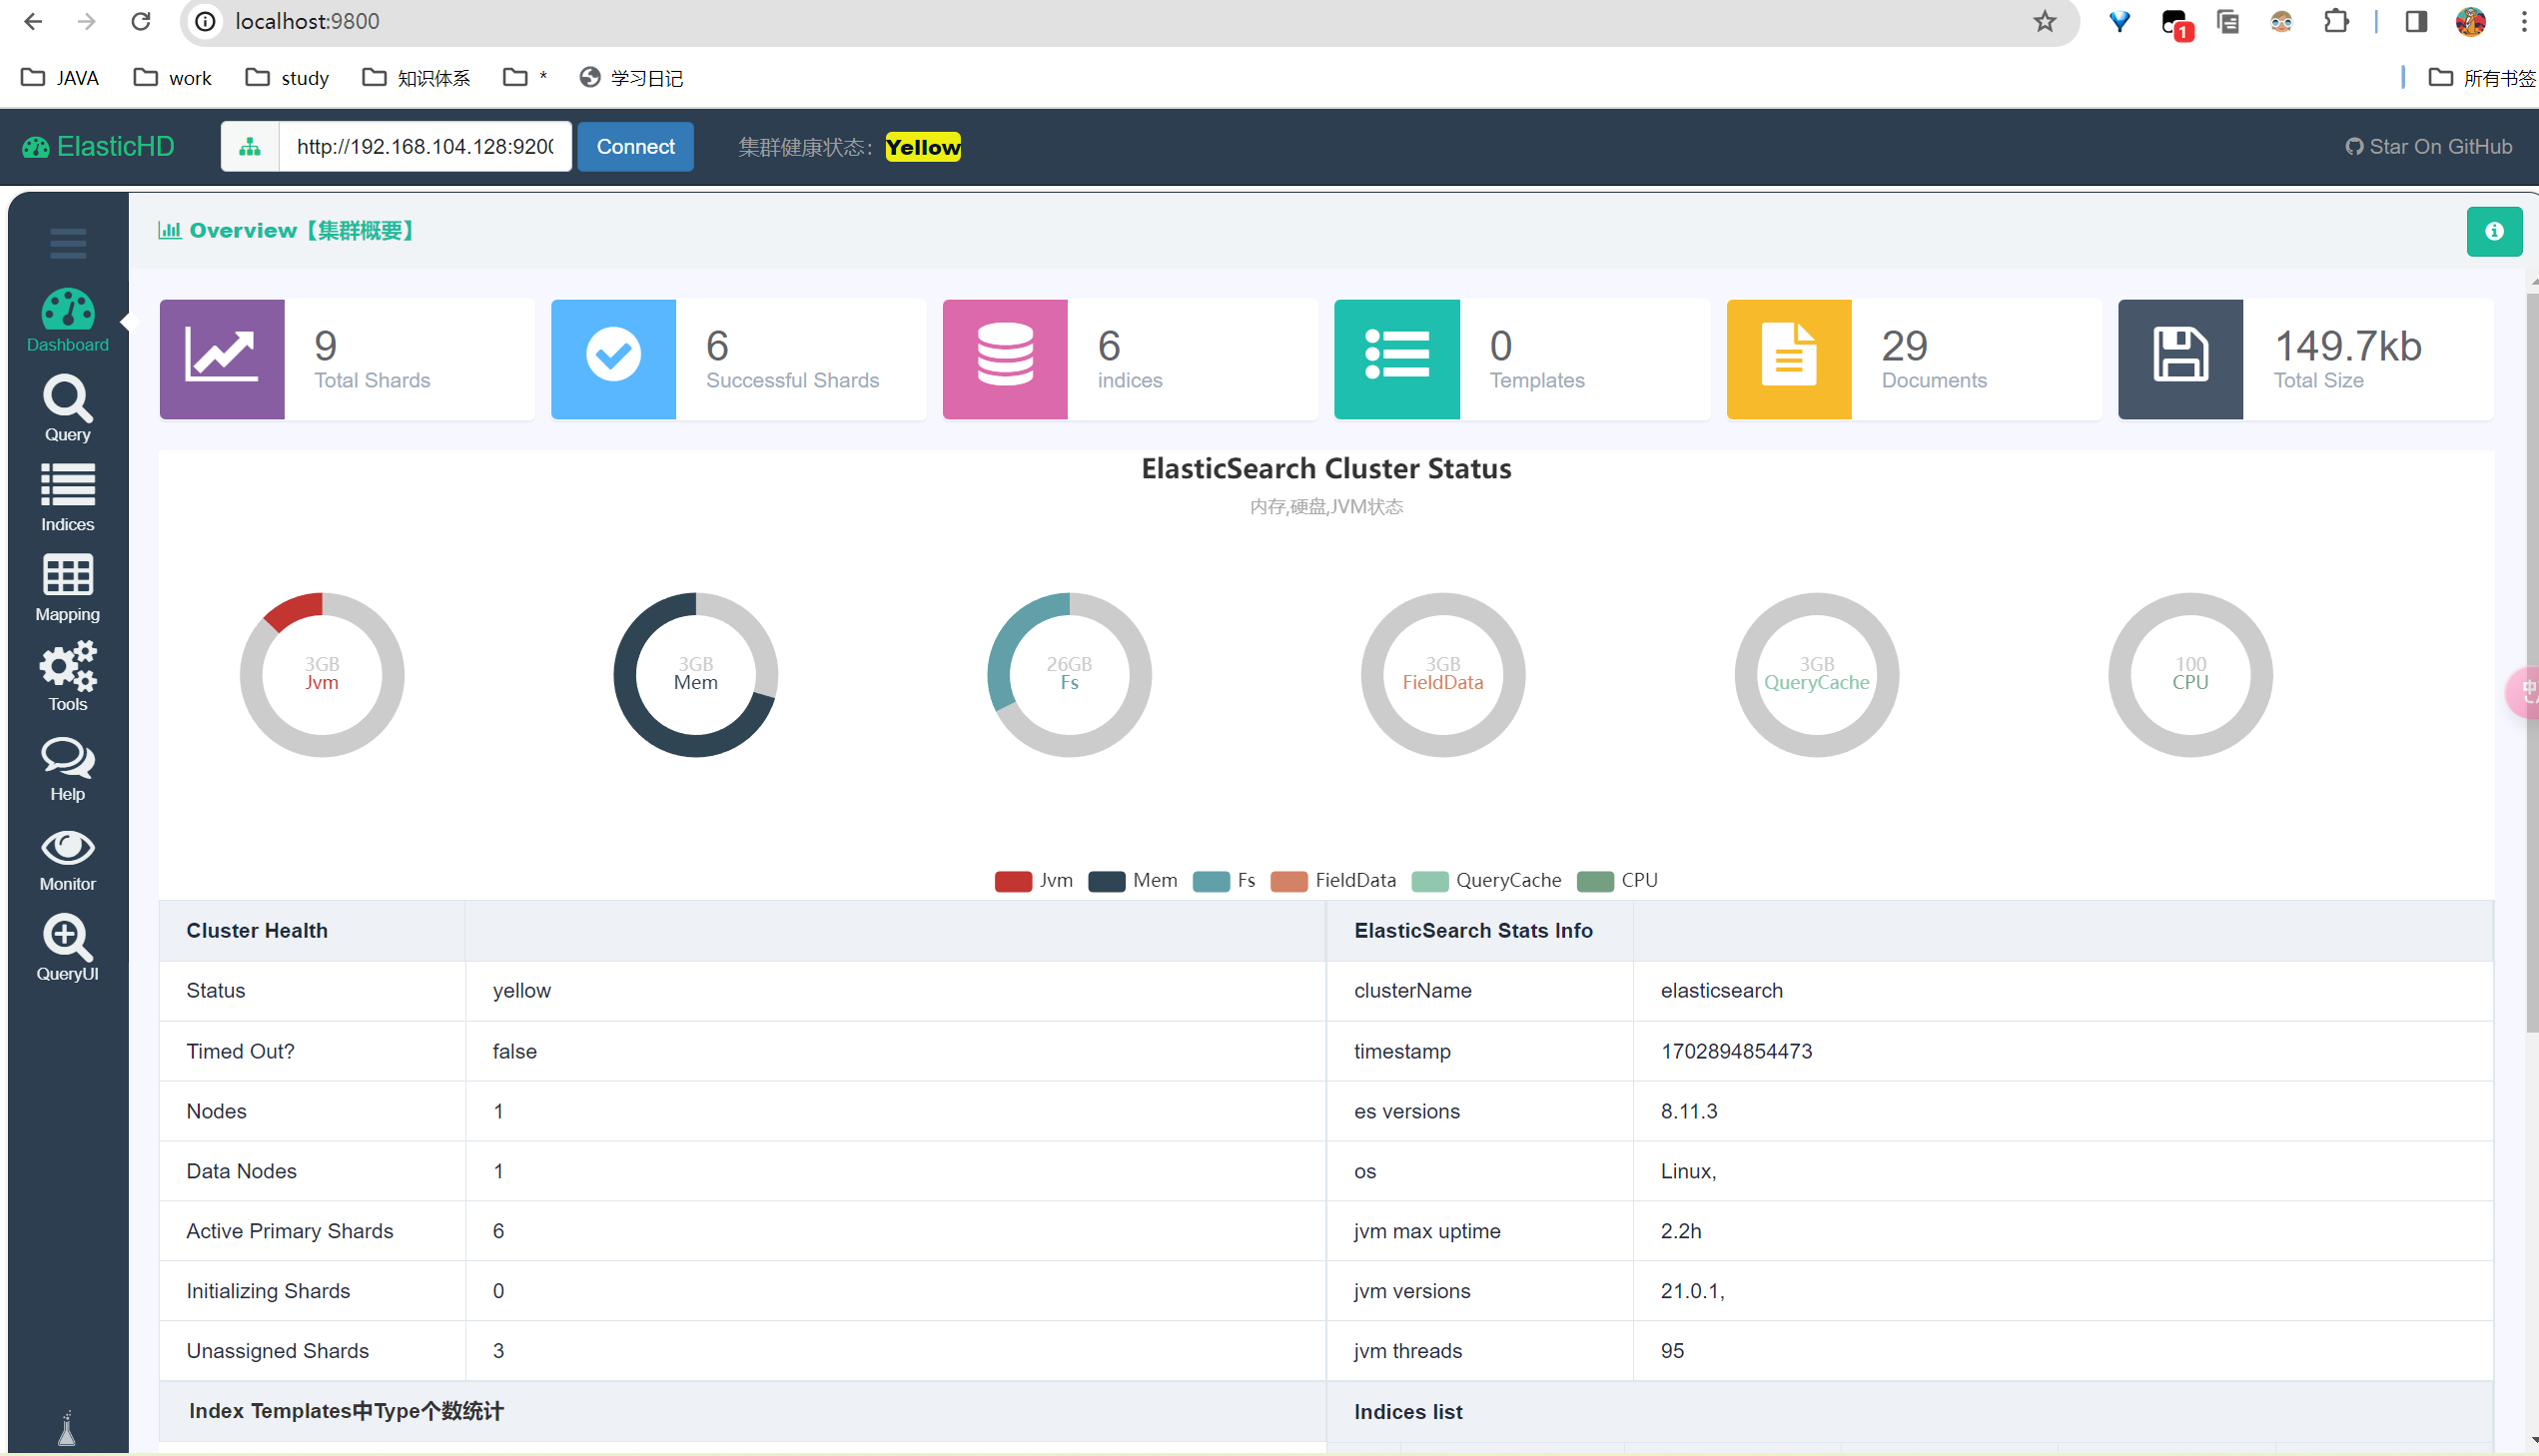
# 连接工具
ElasticHD